5 A step-by-step guide to set up a WordPress website for beginners
Step 1: Buying the right domain and WordPress hosting
Buy domain name
To set up a WordPress website, you need a domain name and Webhosting, it’s obvious.
Your domain is the home of your website on the internet, user type your domain name in the search bar of the browser to land on your website with navigational search intent. If you need help to choose the right domain you can read: How to Buy a Domain and Hosting.
You can get a high-end extension domain as low as $1.5 for a year and later it may cost you more at the time of renewal but at that time you can decide whether you are going ahead with the current domain name and website or not.
So it will make sense to invest more money when you completely agree with the idea of your website and you will not need to switch it later.
On the other hand, to get your website running and live on the internet you need web hosting.
Buy web hosting
Hosting may cost from $5/month to $250/month and there is nothing we can say the right and wrong between these price ranges because the price of any hosting is calculated based on the performance and feature of web hosting.
So it depends on your need, you have to decide, which web hosting would be best for you?
When it comes to buying hosting, the resources storage options also play an important role, you must cross-check whether it’s enough to store your resources on the website.
A business or blog with tons of traffic may need cloud hosting or even a dedicated server which costs much higher than the simple shared and VPS web hosting.
If you are just starting out and you don’t have tons of traffic already coming to your website, you may go with VPS web hosting which will cost you less than the cloud and dedicated hosting and it also gives an outstanding performance.
Our recommendation for beginners is Bluehost WordPress hosting, which is officially recommended by WordPress, and it offers unlimited resources and outstanding features at as low as $2.5/month which is a great deal for beginners.
Disclaimer – Here at concept blogging we believe in transparency between you and us. For the tutorial purpose, I will use Bluehost hosting which I also recommend you to buy. If you purchase the hosting from our affiliate link, we may get a commission to get a cup of coffee and return on the effort I have done to provide this informational guide for you. We assured that our main aim is to provide value to our user so we only recommend the stuff which personally uses.
If you want to go ahead and buy hosting, and you want to know more about Bluehost and their plans before you make a purchase then you should read this informative article, I have written for you…
How to buy the right Domain name and Hosting for your WordPress website.
Step 2. Installing WordPress in your hosting
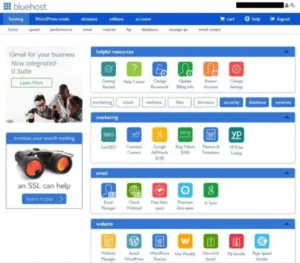
Once you have successfully bought the Webhosting, head over to the Cpanel given within your account.

Here you will find tons of option which is not for the use of you right now…
Search for, ”Install WordPress” on the above search option and install it…
Bluehost provides a one-click WordPress installation which makes the process easy for you.

When you will click on install, you will be asked to select/enter the domain name and WordPress account details.
If you purchased the domain name from Bluehost with hosting, you will see the option to choose that domain from dropdown.
If you already have an existing domain, then enter your domain name manually.
Note – if you are using an existing domain name, you will have to change the name servers of your domain name.
Remove the old nameserver’s entry and change it into
- ns1.bluehost.com
- ns2.bluehost.com
Now you have to enter your username and password which you will use to login to the dashboard/admin panel of your WordPress website.
You can also change this detail later in the setting of the WordPress dashboard.
You will see the option to install themes and plugins, just skip it for now.
We will do it later in the WordPress dashboard.
Once you entered all the details, click install and sit back.

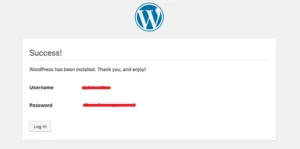
It will be installed within 2 minutes.
Now your WordPress website is live and ready to customize.
Note- if you have recently updated your nameservers, it might take up to 24 hours to update those servers. If your nameservers are not updated, you will get the 404 error when you will visit your website. So there is nothing wrong with it, you just have to wait for it.
once your name servers are updated and you are able to browse it.
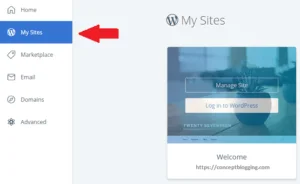
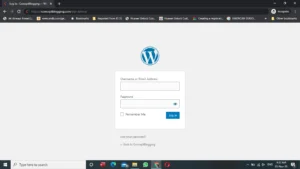
Now head over to the browser and login into the admin panel of your WordPress website.
Just types your domain name into the search bar along with “/wp-admin”
For example –
If your domain name is,
www.conceptblogging.com
You need to type, www.conceptblogging.com/wp-admin
When you will hit enter, you will need to enter the login details of your WordPress admin panel which you have recently chosen at the time of WordPress installation.

Enter the details and click login

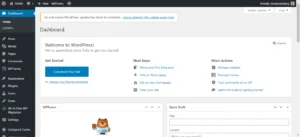
Now you are successfully logged in to the admin panel of your website.
Congrats!
You have completed the major milestone to set up a WordPress website.
Your website is live now and you have access to the admin panel.
Now it’s the time to install your themes, plugins, and customizing your website, let’s move into another step.
Step 3. Installing a WordPress theme
As I told you before, creating any kind of website on the internet is very easy with the help of WordPress.
You don’t need to write codes and still, you can set up a WordPress website that looks professional with all different types of designs, format, and UI.
How is it possible?
That’s where the WordPress theme comes in.
With the pre-made design, a WordPress theme can totally change the look and user experience of your website within one click.
Different WordPress themes serve a different purpose.
There are thousands of dedicated WordPress themes for e-commerce stores, personal blogs, business websites, and portfolios, etc.
WordPress has thousands of free ready to install themes available for almost all kinds of websites.
If you want to get a more professional look and take control over everything, you may purchase a premium WordPress theme according to the look you want.
My recommendation for premium themes is GenratePress premium and Astra pro.
What makes these themes special is they are very lightweight, fully customizable, and compatible with all major page builders.
If you don’t know about page builders, these are plugins that help to create costume page design at any section of the website with the help of drag and drop function.
We will talk about it in detail later in the section below.
GeneratePress premium and Astra pro also offer a version which can be used to create a decent website, it has lots of pre-made templates available inside the theme options.
If you want to access more professional and customizable templates and take over the total control on theme customization then you can purchase the premium version of both themes.
If you purchase from the links given, you will get a huge discount on the regular price.
Buy from here —>Astra Pro<—
Buy from here —>GP Premium<—
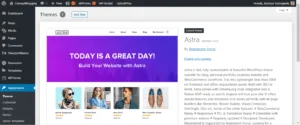
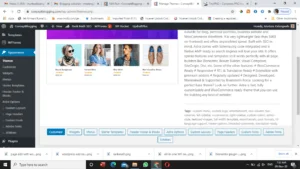
To install WordPress theme, click on the option, “appearance” then “themes”
This is the theme section.

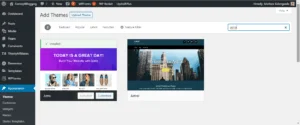
Now click on the, “Add new”
And search for your desired theme.

Once you find the right theme, click on the theme to install it.
Now it will ask you to activate the theme click on “Activate theme”
6 How to customize WordPress website
In the above section, we have discussed how to purchase the hosting, domain, and install WordPress in it, now it’s time to start customizing your WordPress website.
1. Install WordPress plugins for different purposes
Now you have installed the theme, your website’s look has been changed.
It’s time to install WordPress plugins, which are used to perform several operations of your website.
While WordPress theme is to change the look and user experience of your website, plugins come to add costume functionalities.
From the security purpose to page building and website backup, there are various plugins available.
As you will go ahead with WordPress website development, you will find tons of plugins to perform specific tasks on your website.
Here I am going to describe some common and must have WP plugins:
Wp rocket
Wp rocket plugin is a catch optimization plugin that reduces the size of java scripts and jQuery used in your website design which results in faster page loading speed.
It also optimizes the high-quality images uploaded on your website within one click.
Web site page loading speed plays a vital role in SEO ranking and user experience.
With the lazy load enables, WP Rocket reduces the number of image loading requests from the server at a time, it only allows to load of those images in front of the user’s eye.
It doesn’t load all the images at one time, which ultimately increases the page loading time.

Elementor is the most popular page builder plugin on WordPress, it allows you to create beautiful looking pages with drag and drop function.
With the help of the Elementor page builder, you can create any kind of page design that comes into your mind.
Elementor also has a free version and all basic features are enabled in it.
If you want to go for more advanced customization, you can purchase the Elementor pro which enables you to use several pre-made templates inside the eliminator’s library.

All in one WP migration plugin enable you to…
- Migrate your website from one hosting to another hosting
- Shift your website from one domain to another domain
- Safely backup your website.
Within one click, this plugin will enable you to export your entire website as a file in the local storage of your computer and it can be used later to import into another WordPress dashboard as It as.

Rank math plugin is an alternative option of a famous SEO plugin, it is used to optimize the content for SEO.
It allows you to write SEO optimized content by targeting the keywords you enter.
2. Creating costume pages
Regardless of the type of website you are creating, there will be a header section where you will add the costume pages of your website such as Contact, about us, privacy and blog, etc.
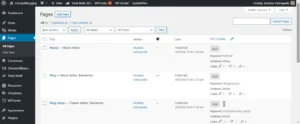
Head over to the “page option” and click on, “Add new”

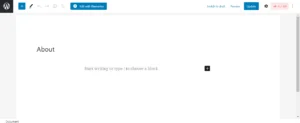
Give your page a title such as a contact & privacy etc.

And write the content of your page insight into the box and hit publish.
You can create as many pages as you want, that you are going to attach in the menu section of your website.
3. Customizing WordPress theme
Let’s see how you can customize the WordPress theme to give it personal look.
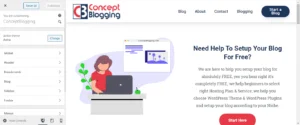
Head over to the “customization” option inside the theme section.

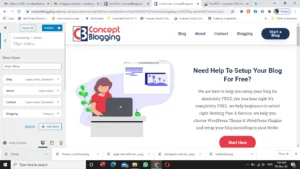
You will see this theme customization section at the left corner and website preview at the right corner.

Let me give you a quick description of each option…
Site identity – Here you can insert and edit the site title, headline, and logo of your website.
Layout –
- Here you will see the option, “container” where you can edit the space between the text and other content of your website.
- You can also edit the navigation, header, and footer bar of your website
Colour – As cleared by the name, this section allows you to change the colour of each and every section of the website. You can decide on a colour pattern and modify your website around it to give it personalized look.
Typography – This section allows you to change the look of fonts on your pages, blogs, header, and footer.
Background image – it is used to insert the background image on your website. Just leave this section empty, it’s none of the use until you want to add the big images behind all the content of your website which looks messy and unprofessional.
General – This option is used to enable a common dynamic function on your website, you can play around with it.
Menu – This is the main menu of your website which shows up beside the logo above and below the header. You have to open this option and add all custom pages to the menu which you created to add to your website.

Here you can add and delete the pages.
Widget – This section can create a custom widget on the header and footer section of your website.
Homepage settings – Here you can set what page will show up on the home of your website.
There will be two options
- A static home page – It is the fixed home page, you can design your home page in theme customization or in any page builder.
- Your latest blog – If you select this option, your latest blog
Additional CSS –
I advise you to use leave the widget and Additional CSS section, as it is, and use pages builder like Elementor instead to create the custom widgets.
It’s very easy and handly plus it enables several customization options.
Don’t mess with the Addition CSS option if you aren’t familiar with HTML/CSS otherwise, it can ruin the look of your website
Now you have successfully created the WordPress website from the top to bottom


